Friday, August 29, 2014

Holiday Magazines


From September through December, seasonal magazines hit the shelves like mad! On top of that, many people (like this one here) have a hard time saying no to most of those to do with food, home, gardening, or decorating. So, by the time Christmas comes around, there is a row or more of magazines collected over a 4 month period lining part of the bookshelf, making for one awful eyesore. For those out there who have a hard time turning down magazines featuring favorite topics yet find that those magazines are really stacking up, here is a solution that costs $5 or less to get rid of that unsightly row of paper in the bookshelf. 

Holiday Notebook

Arrange recipes, decorating tips, or other holiday items (stories, travel information) in a large notebook. 
  • Arrange magazines into categories and holidays (example: Category-Food, Holidays: Thanksgiving, Christmas)
  • Use separate notebooks for each category or use one large notebook to place multiple categories in.
  • Dividers can be used to organize items, such as: Christmas desserts or Thanksgiving casseroles, or decorate construction paper with a collage of pictures or drawings or stickers and write which item will be featured on the following pages.
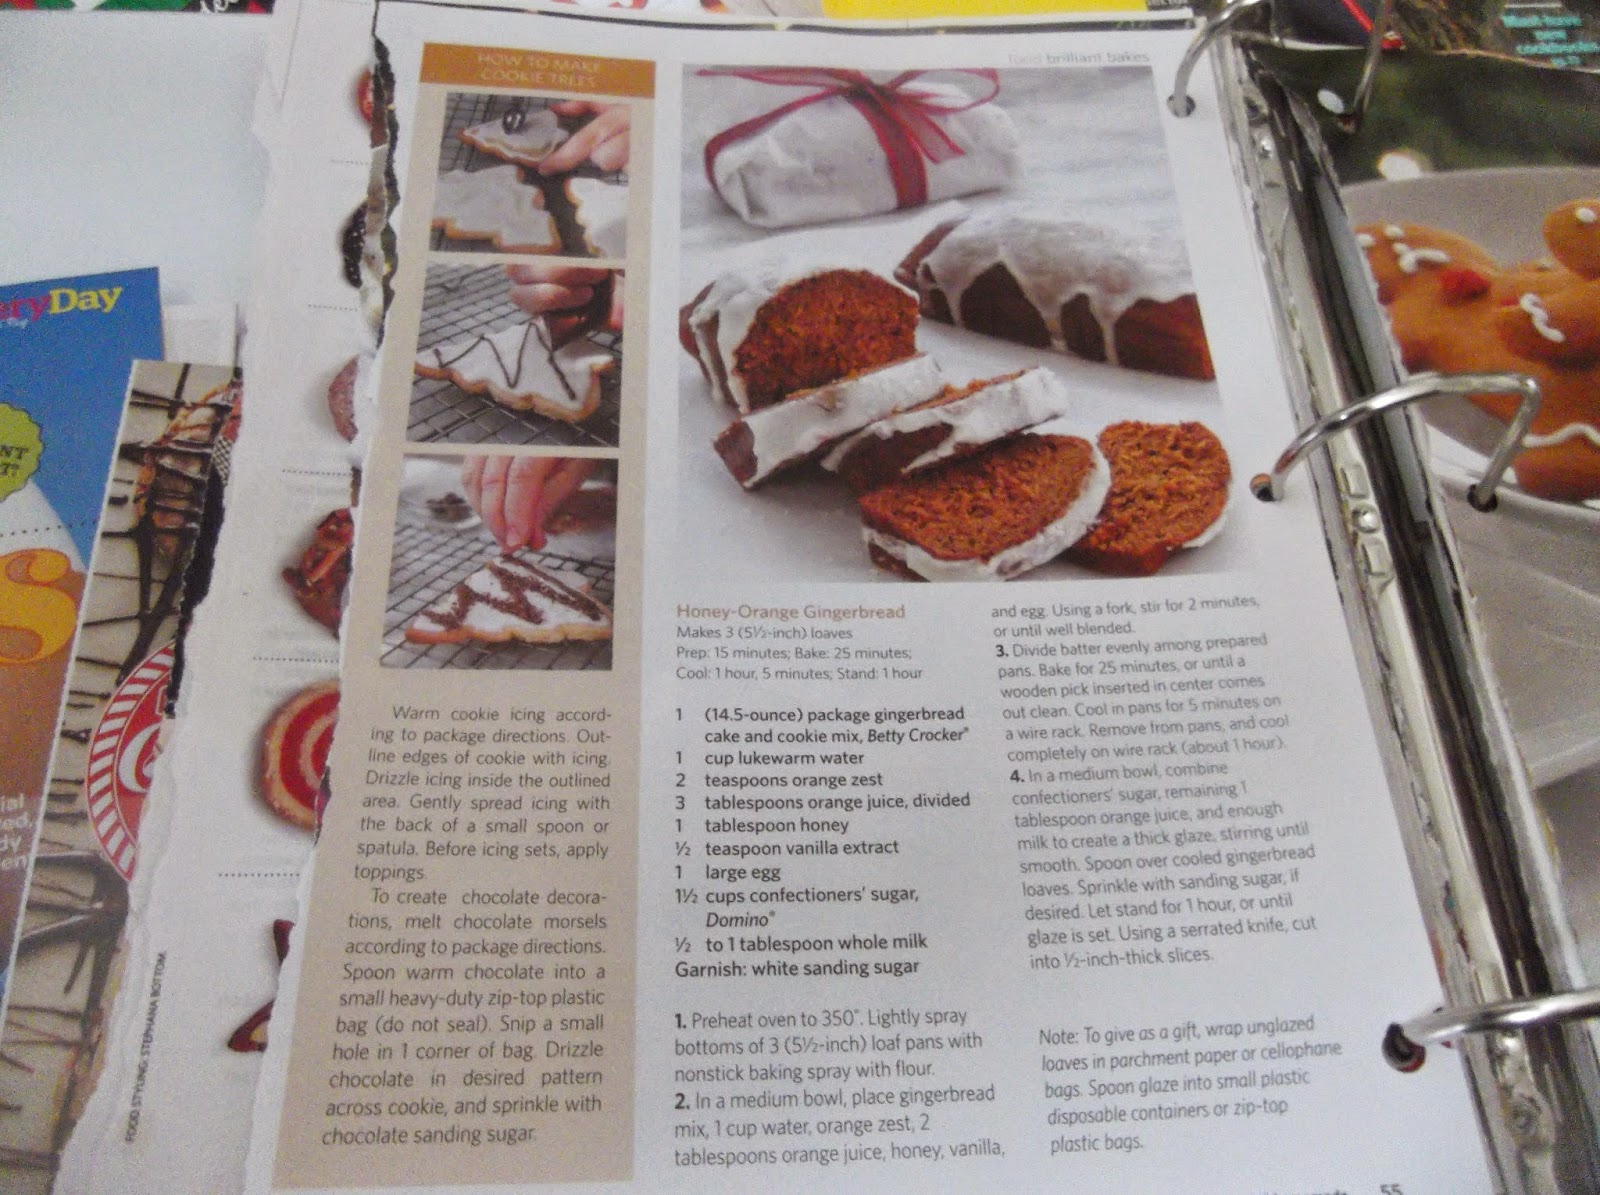
  • Next, go through the magazines and decide which pages to keep, try not to go crazy, really consider what would be worthy to keep and what is just being kept because the picture looks good.
  • Use a 3 ring hole puncher to punch holes into the cut out magazine pages and place in notebook, or use clear paper holders or laminate holders to place the magazine pages in.
  • Arrange alphabetically or just by category, place on a bookcase and enjoy the space.
  • Recycle all unused magazine material and take off any address information once done.
For the front of the Notebook, I like to create a collage of holiday pictures glued onto construction paper, but it could be left blank or written on with permanent marker. Hope this helps eliminate some clutter and maybe help one easily find old and new recipes or decorating ideas for the holidays. Merry Christmas!
 

Monday, August 25, 2014

Photo Christmas Gifts

Christmas Gifts
Photo Boxes, Photos, and Photo Books

Photos make great gifts and one of the best ways to present them is in a book or organized in a photo box. Creating a book online or a smaller one at home adds a personal touch to a gift and placing it inside a photo box gives the receiver a place to put their own pictures.

Photo Books

There are many online sites where one can create photo books can also go to Walmart, Target, and other retailers online or ask in store and create a book as well. The only down hill about online photo books is, it does take a long time to go through the photos on the computer or in the saved albums, so, instead of doing everything online, choose the photo book first and find out how many pictures it holds, choose the desired pictures to place in it and order them. Printed pictures are super cheap and there are often offers for 100 or 101 free prints from some sites. When creating a photo book online, be sure it will fit into the chosen photo box.   

Photo Boxes
Photo Boxes are available at any store with a home store and at many craft stores. Of course, another thought is, instead of a photo box, use a medium sized square basket or even a storage box. 

Presentation 

There are several ways to present the photo box gift, here are a few suggestions: 
  • Place photo book in the box, wrap a ribbon around the box with a large bow.
  • Wrap everything, the photo book inside the box and the box or separately.
  • Leave the photo box unwrapped, wrap the book
  • Instead of filling the photo book, fill it with several pictures and then write a note after the last one telling the receiver to continue making memories.
  • For new parents: Place a photo of the new baby inside the box along with a blanket or new clothes and a card saying something like, "hope your new joy fills your life with many memories." Wrap the box or wrap the blanket, toy, or clothes in the box. This is a wonderful idea for new parents.
  • Newly weds, same as new parents-not filled with baby clothes, but maybe with a card and a gift certificate to a home store.
The possibilities of what one can do with this idea is vast. One of the best things is, there have been sales on photo boxes up to 80% off, found some for as low as $3.50!!! Making this, not only a unique idea, but a bit friendly on the wallet. Merry Christmas!!! 


Monday, August 11, 2014

Curtains for Christmas

Christmas Curtains

 Many folks love making changes, big and small, to the interior of a home during the various seasons and holidays throughout the year. However, some changes can become pretty major expenses, but most seasonal shoppers have become pretty good at keeping down costs and this decorative idea is definitely one.

Making the home feel more like the holidays (like those in holiday movies) is as easy as changing the curtains, tablecloth, pillows, throws, and flowers throughout the home. Even so, there are times when finding the curtains and home items desired just does not happen, that is when fabric, scissors, and fabric glue can become a persons best friend. 

Christmas Curtains:

Materials:

  • Red or Green Fabric (cotton), measured to fit windows
  • Green, White, Yellow, Blue, or Red fabric for Christmas Shapes
  • Christmas Stencils or cookie cutters
  • Fabric Glue
  • Scissors
  • Black Sharpie
 Directions:

  1. Measure for the curtains, height and length. Add 4-5 inches to the height.
  2. Determine what color curtains and what shapes (if any) will be on them. 
  3. Lay the curtains on a sturdy flat surface.
  4. Fold the sides of the curtain in 1/2 to 1 inch and glue. Press gently down the sides in order to keep everything straight and prevent lumping.
  5. Fold the bottom of the curtain 1 inch (more if needed, if the fabric is too long) and glue.
  6. Fold the top part over, leave enough space to slide the curtain onto the rod (anywhere from 1 to 2 inches should be fine. Glue the rest of the fabric and let it dry over night or go ahead and place shapes on the curtain.
  7.  Trace shapes onto the other pieces of fabric and cut out. Glue onto desired spot.
  8. Let the curtains dry over night before hanging. 
This is a good craft for kids, and would be perfect for adding some holiday cheer to their rooms. If desired the shapes can be sewn on or the kids could use fabric markers and trace and color the shapes. Merry Christmas!!! 

Saturday, August 2, 2014

Homemade Christmas Gifts and Kid Craft

Homemade Gifts

Homemade gifts are the best, especially when they are made by the kids and there is one gift that will become well loved thanks to some crafty ideas. Everyone gets kitchen and bathroom towels at some point, and at some time or other one gives those items to people for a variety of reasons. Instead of giving the same Christmas patterned towel sets, again, surprise the relatives with personalized towels and potholders from the kiddos!

Christmas Potholders and Kitchen Towels

Materials:

  • Christmas Cookie Cutters or Stencils
  • Fabric Paint in desired colors
  • A set of Paint Brushes
  • Plain white, preferably smooth, kitchen towel and potholder
  • Fabric Spray Paint (optional)-red, green, silver, or blue
Directions:

  1. Wash the potholder and towel before painting them. Make sure they are completely dry. 
  2. If desired, go outside, place the potholder and towel on some new paper and spray paint a Christmas color (this is optional). Let dry over night before painting over.
  3. Use stencils or cookie cutters to paint designs onto the items.
  4. Wait until paint is dry and iron the paint onto the fabric. Do not use steam, and move the iron over the painted fabric constantly to set the paint. Do this for 2-3 minutes.
  5. Prepare for packaging, simply place in a decorative bag or wrap in a box. 
Children could also do hand prints on the fabric, and it does not have to spray painted, it can be painted on. If using stencils, use a variety of colors if desired and one can hold it in place with a few pieces of scotch tape. Put something between the towel/potholder and the surface it is on while painting, cardboard works well but so would newspapers or paper bags. Happy Holidays!!!